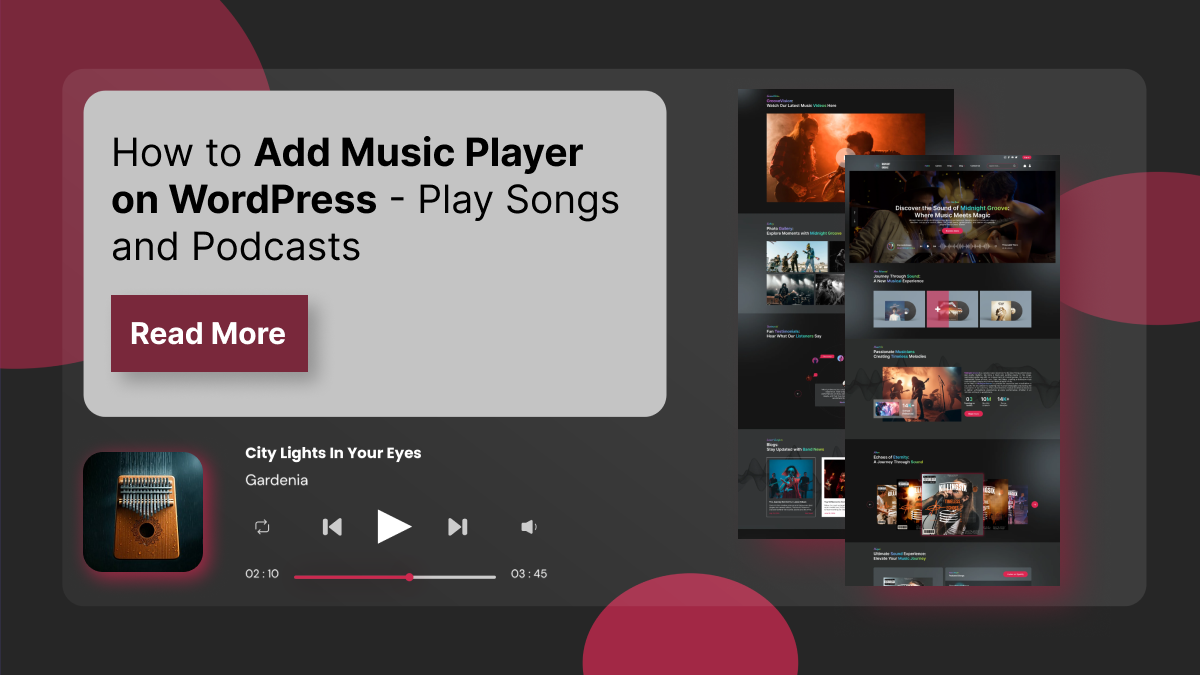
Adding a Music Player on WordPress is an excellent way to showcase your songs or podcasts, providing your audience with a seamless listening experience. Whether you’re an independent musician, a podcaster, or a content creator, having a dedicated audio Music Player on WordPress makes it easier for your visitors to enjoy your content directly. With the right tools and a bit of customization, integrating an audio player can enhance user engagement, keep visitors on your site longer, and promote your work more effectively.
In this blog, we’ll walk you through the process of adding a Music Player on WordPress, step-by-step and create music website for your band or Podcaster website. From selecting the right audio player plugin to embedding and configuring it on your WordPress website, we’ll cover everything you need to know. We’ll also explore customization options and provide tips for optimizing your player for better user experience and SEO. Whether you’re looking to display a single track or a full playlist, we’ve got you covered with easy-to-follow instructions. Let’s dive in and get your music or podcast playing for the world to hear!
Benefits of Adding Music Player on WordPress
Adding an audio Music Player on WordPress can offer numerous benefits, enhancing both user experience and engagement. Here are some key advantages:
- Improved User Experience: An embedded audio player allows visitors to listen to your songs or podcasts without leaving your website, providing a seamless and engaging experience. Visitors can enjoy content while browsing, keeping them on your site longer.
- Increased Engagement: Having a player encourages users to interact with your content, whether it’s listening to a song, a podcast episode, or an entire playlist. This interaction can foster a deeper connection with your audience.
- Enhanced Branding: Music and podcasts are powerful branding tools. Adding a Music Player on WordPress gives visitors direct access to your content, strengthening your brand identity and voice.
- Content Accessibility: A player allows your content to be easily accessible to anyone, anytime, promoting greater exposure. It also ensures that your audience can listen to your material across various devices, whether they are using a desktop, tablet, or smartphone.
- SEO Benefits: When embedded correctly, an audio player can contribute to your website’s SEO by driving traffic, increasing on-page time, and enhancing your content’s visibility on search engines.
- Monetization Opportunities: If you’re an artist or podcaster, an audio player can be a tool for monetization. You can integrate links to purchase your music, subscribe to your podcast, or even run ads directly within the player.
Overall, adding a Music Player on WordPress is a great way to offer value to your audience while boosting your online presence.
Steps to Add Music Player on WordPress
Adding a Music Player on WordPress is an effective way to showcase your music, podcasts, or other audio content. Let’s walk through the steps required to add an audio Music Player on WordPress, from choosing the right player to customizing it and optimizing it for better performance.
Step 1: Set Up a Website with a Music Band WordPress Theme

If you’re looking to showcase your music, promote your band, or stream podcasts directly on your website, the foundation begins with choosing the right WordPress theme. A niche-specific theme like the Music Band WordPress Theme is crafted with musicians, bands, and audio artists in mind, offering built-in features tailored to your creative needs.
The Music Band WordPress Theme is a dynamic and one of the best responsive WordPress themes that is visually engaging theme designed specifically for artists who want to present their albums, singles, playlists, and tour schedules in one centralized platform. It comes with audio player integration, allowing you to embed your songs or podcast episodes right on your site making it easy for visitors to listen without navigating away. With support for custom post types such as albums, events, and discography, this theme is ideal for managing all the elements a music-centric website needs.
The setup process is streamlined, especially for beginners. Once you install the theme, you can easily import a ready-made demo that includes a homepage with a featured audio player, a discography section, and even a blog for news or episode updates. The theme is also fully compatible with major audio plugins and music streaming embeds like SoundCloud, Spotify, or native HTML5 audio players.
By using a purpose-built theme like this, you not only reduce the need for complex configurations but also ensure your brand, sound, and content are professionally represented. It’s mobile-friendly, SEO-optimized, and designed for high performance making it the perfect platform for artists who want to grow their online presence and fanbase.
Step 2: Choosing the Right Audio Player

The first step in adding a Music Player on WordPress is selecting the right audio player that aligns with your needs and website goals. With numerous audio player plugins available for WordPress, each offering distinct features tailored to different types of audio content, it’s essential to choose one that best fits your requirements. Some audio players are designed for simple audio embedding, while others come with advanced features such as playlists, controls, and audio streaming capabilities.
One of the primary considerations when selecting a player is whether to go for a free or paid plugin. Many free plugins provide basic functionality, allowing you to embed individual audio files with ease. However, premium plugins typically offer additional features like advanced customization options, in-depth analytics, and integrations with popular music platforms, offering a more robust experience.
Compatibility is another crucial factor. Ensure that the player you choose is compatible with your website’s content management system (CMS) or custom HTML code. Most players are designed to work seamlessly with popular CMS platforms like WordPress, but it’s always advisable to check the documentation for specific compatibility details.
Key features to look for include:
- Playlist support: Ideal for showcasing multiple songs or podcast episodes in a single player.
- Mobile optimization: Ensure the player is responsive and works smoothly across all devices.
- Customizable design: The player should match your website’s design and branding.
- SEO-friendly features: Some players allow you to add metadata, like track titles and descriptions, improving your SEO.
Popular audio players include MP3 Audio Player – Music Player, Podcast Player & Radio by Sonaar, AudioIgniter Music Player, and Podcast Player – Your Podcasting Companion, among others. For sites hosting content on platforms like SoundCloud, Spotify, or MixCloud, embedding their players is also an excellent option.
In our Premium Music Band WordPress Theme by WP Elemento, we use the MP3 Audio Player – Music Player, Podcast Player & Radio by Sonaar plugin to integrate the audio player, offering a perfect fit for showcasing music and podcasts.
Step 3: Installing the Audio Player Plugin
Now that we’ve chosen the MP3 Audio Player – Music Player, Podcast Player & Radio by Sonaar plugin, let’s go through the detailed steps to install it and add a Music Player on WordPress. This versatile plugin allows you to display stylish and customizable audio players, making it ideal for musicians, podcasters, and radio streamers.
To begin, log in to your WordPress admin dashboard. From the left-hand menu, navigate to:

- Plugins > Add New
- In the search bar, type MP3 Audio Player – Music Player, Podcast Player & Radio by Sonaar.
- Once the plugin appears, click the Install Now button.
- After the installation is complete, click Activate to enable the plugin on your website.
- After activation, you’ll be prompted to run the setup guide, which helps you configure the basic settings.
Step 4: Configure the Plugin with the Setup Guide

To effectively add the MP3 Audio Player by Sonaar on your website, you need to configure the plugin using its intuitive setup guide. This guide walks you through the essential settings, ensuring the player functions perfectly according to your website’s content type and design preferences.
First, you’ll be prompted to select your website type, which determines how the player will operate. You can choose from three options:
- Music: Ideal for musicians, artists, and beat stores, offering tailored features for music playback and album showcasing.
- Podcast: Designed for podcasters, audiobook creators, or storytellers, providing streamlined audio playback and easy episode management.
- Radio Streams: Best suited for online radio stations, live streams, and Icecast broadcasts, allowing seamless continuous audio streaming.
Next, you’ll configure the progress bar style, which defines how the audio track’s playback is visually represented.
- Waveform: A visually dynamic bar that displays real-time audio frequencies, creating an engaging, modern look.
-
Simple Bar: A clean, linear progress bar ideal for minimalistic designs.
You’ll then specify if you plan to sell audio files through your website.
Selecting Yes enables additional eCommerce features, allowing users to purchase audio tracks.
- Choosing No keeps the player for streaming and listening purposes only.
- Finally, select from the player templates to define the visual style of the audio player.
- These templates control the layout, colors, and overall appearance, ensuring it blends seamlessly with your website’s design.
- Once you complete these steps, the basic configuration is successfully done, and your player is ready for further customization and content integration.
Step 5: Add Tracks to the Player

After completing the basic configuration of the MP3 Audio Player – Music Player, Podcast Player & Radio by Sonaar plugin, the next step is to add tracks or playlists to the Music Player on WordPress. This allows you to showcase your audio content with a fully functional and visually appealing player.
To get started, navigate to your WordPress admin panel. On the left-hand side menu, locate the MP3 Player section and click on Add New Track. This will open the track creation interface, where you can begin adding your audio content.
First, enter a Playlist or Track Title, giving it a clear and descriptive name. If desired, you can add a Playlist Subtitle to provide additional context. You can also choose to enable the Reverse Order option, which displays the tracks in the opposite order they were added.
Next, select the Tracklist Source. You have three options:
- Local MP3: Upload audio files directly from your media library.
- External Audio File: Use links to stream audio from external sources.
- Icecast: Add live streaming audio from Icecast servers.
- Upload or link the desired MP3 file and enhance its visual appeal by adding a Track Cover Image. This image will represent the track, making the player more engaging.
- For premium users, additional features are available. You can add lyrics for karaoke, include unique track images, and insert links or call-to-action (CTA) buttons to direct listeners to external sites or promote specific content.
Once you’ve filled in all the necessary details, click on Publish to save and display the track or playlist on your website.
Step 6: Add the Music Player on WordPress with Elementor

Adding a Music Player on WordPress using the MP3 Audio Player – Music Player, Podcast Player & Radio by Sonaar plugin can be done in several ways, but in this guide, we will focus on using Elementor pro page builder. Elementor offers a user-friendly drag-and-drop interface that allows you to easily customize and position the Music Player on WordPress without needing to write any code.
The plugin provides multiple options to integrate the player, including:
- Gutenberg Blocks: For WordPress sites using the Gutenberg editor.
- Elementor Widgets: For Elementor-based sites, which is our focus here.
- Shortcodes: For custom HTML or PHP integration, allowing flexibility for non-Elementor users.
To add the audio player using Elementor:
- Navigate to the Desired Page or Post: Begin by going to the page or post where you want the audio player to appear on your website.
- Edit with Elementor: Once you’ve selected the page, click on the Edit with Elementor button. This will open the Elementor editor, where you can customize your page.
- Search for the MP3 Audio Player Widget: In the Elementor panel on the left, type MP3 Audio Player in the search bar. You will see the widget appear in the results.
- Drag and Drop the Widget: Click and drag the MP3 Audio Player widget from the left-hand panel into the section where you want the player displayed on the page. Position it exactly where you want users to see it.
- By using Elementor, you can easily customize the appearance and layout of the audio player to match your website's design.
Step 7: Configure the Elementor Widget Settings

Once you’ve added the MP3 Audio Player – Music Player, Podcast Player & Radio by Sonaar plugin to your page using Elementor, the next step is to configure the widget settings to customize the Music Player on WordPress. These settings allow you to control how the player looks and behaves, ensuring it matches your design and functionality preferences.
The widget offers a range of options that can be toggled on or off based on your needs:
- Show Tracklist: This option allows you to display or hide the full list of tracks in your playlist. If you’re showcasing multiple songs or podcast episodes, enabling this feature will allow your visitors to browse through all the available tracks. If you prefer a cleaner look, you can hide the tracklist, displaying only the audio player.
- Hide Mini Player/Progress Bar: The progress bar is a visual representation of how much of the audio track has played. You can choose to hide the mini player or progress bar if you prefer a minimal design without these elements. Alternatively, keeping them visible will allow users to track the playback progress.
- Hide Image Cover: If you want a sleek, clean design without a visual representation of the track, you can choose to hide the image cover of the track. This is especially useful if you want the focus to be on the audio controls or the playlist itself.
- Display Controls on Top of the Image Cover: For a more visually integrated look, this setting places the playback controls on top of the image cover. This is ideal if you want to optimize space and ensure the controls are easily accessible while keeping the image as a backdrop.
-
External Links: If you wish to link specific tracks to external websites, such as a purchase page or another page with more details, you can enable external links. This is useful for driving traffic or providing more context about the audio content.
By customizing these settings, you can tailor the audio Music Player on WordPress to meet your design requirements and provide a better user experience.
If you exploring for more options and thinking of building a custom widget for your website that can help to add a special content display, an advanced interactive feature, or a completely new style to your website, building custom Elementor widgets can give you the flexibility and control you need. Creating custom Elementor widgets for your website opens up a world of possibilities, allowing you to enhance your design and functionality.
Step 8: Unlock Pro Features (Optional)

If you’re using the Pro version of the MP3 Audio Player – Music Player, Podcast Player & Radio by Sonaar plugin, you gain access to a host of advanced features that elevate the functionality and design of the Music Player on WordPress. These features are designed to provide a more dynamic, interactive, and user-friendly audio experience.
- Enable Sticky Player: This feature allows you to display a sticky footer player bar that stays visible at the bottom of the screen, even as users scroll down the page. It ensures the player is always accessible for playback without interrupting the user experience.
- Enable Carousel & 3D Coverflow: Add a visually engaging rotating carousel of album or track covers, along with a 3D coverflow effect. This effect creates a modern, dynamic visual display of your audio collection.
- Enable Animated Audio Spectrum: Enhance the audio experience with a live animated audio visualizer that responds to the music. It creates a visually interactive way for users to engage with the rhythm and beats.
- Enable Adaptive Colors: This feature automatically adjusts the player’s colors to match the track’s cover artwork, providing a seamless and customized look for each song or playlist.
- Enable Grid Layout: You can transform your playlist into a grid layout, which makes it easier for users to browse and visually appealing.
- Enable Favorites & Playlist: Users can mark tracks as favorites and create their own personalized playlists, adding interactivity and convenience to the listening experience.
- Enable Search Box: Adding a search box allows users to quickly find specific tracks or albums within the player, enhancing navigation.
- Enable Custom Field Columns: This feature allows you to add custom fields to the tracklist, providing more flexibility in how the audio content is presented.
- Enable Buy Now Buttons: With this option, you can add Buy Now and Add-to-Cart buttons, enabling direct purchase of audio tracks. The plugin also supports music licensing.
- Enable Scrollbar & Track Pagination: For long tracklists, a scrollbar and track pagination make it easier for users to navigate through multiple tracks and playlists without feeling overwhelmed.
- Volume Control and Playback Controls: The volume control slider and options for skip 15/30 seconds, playback speed, and shuffle/random play give users full control over their listening experience.
- Additional Information: You can choose to display the playlist duration, publish date, and the total number of tracks in the playlist, providing important metadata about the audio content.
By unlocking these Pro features, you not only improve the visual appeal of your audio player but also enhance its interactivity and functionality, creating a more engaging experience for your audience.
Step 9: Configure the Style and Advanced Settings
Once you’ve successfully added the MP3 Audio Music Player on WordPress, you can enhance its visual appeal and functionality by configuring the Style and Advanced Settings. These customization options allow you to create a seamless and professional-looking audio experience tailored to your brand’s aesthetics.
Style Settings (Pro Version)
In the Pro version, you can personalize the player’s appearance by adjusting colors, fonts, and spacing. This enables you to align the player’s design with your website’s overall theme. You can choose custom colors for the background, progress bar, and buttons, ensuring consistency with your brand identity. Additionally, you can modify the fonts used for track titles, artist names, and other text elements, creating a polished and stylish look. Spacing adjustments allow you to control the padding and margins, ensuring the player integrates smoothly into your webpage layout.
Advanced Settings

The Advanced Settings offer greater design flexibility and creative control:
Layout: Refine the player’s structure by modifying the dimensions, alignment, and positioning.
- Motion Effects: Add subtle animations, such as fading or sliding effects, to make the player more visually engaging.
- Transform: Adjust the scale, position, and rotation of the player for creative design effects.
- Background: Customize the player’s background with solid colors, gradients, or even background images.
- Border and Mask: Add stylish borders or use masks to create custom shape effects, giving your player a unique appearance.
- Responsive Settings: Ensure the player adapts seamlessly to different screen sizes for mobile and tablet users.
- Attributes and Custom CSS: Add Elementor custom CSS HTML attributes or apply advanced styling rules with CSS for greater customization.
Once all settings are configured, click Publish to make the page live with your fully customized audio player.
Step 10: Test the Player on Multiple Devices

Once you’ve successfully set up and published the Music Player on WordPress, the next crucial step is to test it across various devices to ensure it functions as expected. This testing phase is vital to provide a seamless listening experience for your audience, regardless of their device or screen size.
- Responsive Design Check: Begin by checking if the audio player is fully responsive. A responsive design ensures that the player adapts to different screen sizes without breaking or distorting. Open your website on desktops, tablets, and smartphones to verify that the player automatically adjusts its size and layout to fit the screen. It should be easy to navigate, with no elements overlapping or causing issues on smaller screens. We suggest using bet responsive website builder in order to create a responsive website.
- Audio Playback Testing: Ensure that the audio plays smoothly on all devices. Test the playback controls to confirm that users can start, pause, skip, or adjust the volume without delays or interruptions. Make sure the progress bar and other controls are visible and functional across different screen sizes, so users can navigate the content without difficulty.
- Visual Consistency: The design of the Music Player on WordPress should remain consistent across devices. The color scheme, buttons, and overall layout must be visually appealing and easy to use on any screen size. Test for any design inconsistencies, such as stretched images, poorly aligned elements, or cut-off text that may affect user experience.
- Mobile Optimization: Pay particular attention to mobile optimization. Since many users access websites on their smartphones, ensure the player works flawlessly on smaller screens, providing a smooth and user-friendly experience without sacrificing functionality or aesthetics.
By thoroughly testing your Music Player on WordPress across devices, you ensure an enjoyable and professional experience for all users.
Conclusion
In conclusion, adding a music Music Player on WordPress is a powerful way to engage visitors and showcase your songs, podcasts, or radio streams. With the MP3 Audio Player – Music Player, Podcast Player & Radio by Sonaar plugin, you can create a seamless and visually appealing listening experience with customizable features. We’ve covered the benefits and the detailed steps to help you easily integrate the player into your website using Elementor.
For the best results, we recommend using the Music Band Theme by WP Elemento. It’s the one of the best WordPress Elementor themes for musicians, podcasters, and audio creators, offering a sleek design and seamless integration with the Sonaar player. Built with Elementor, it allows you to customize your website with ease, ensuring a professional and dynamic audio experience.
By following these steps, you can create an immersive audio hub that keeps your audience engaged and coming back for more.

