
Creating a fitness website for your gym is an essential step in attracting more clients, showcasing your services, and building a strong online presence. A well-designed website not only highlights your gym’s unique offerings but also makes it easy for potential members to explore class schedules, book sessions, and learn more about your fitness programs. In our previous blog, we explored the 7 Best WordPress Themes for Gym, where the Personal Trainer WordPress Theme by WP Elemento stood out as a top choice.
In this blog, we’ll guide you through the step-by-step process to create a fitness website using this theme. From installation and customization to adding essential pages like membership plans, class schedules, and trainer profiles, we’ll cover everything you need to build a professional and engaging gym website. Whether you run a small fitness studio or a large gym, this guide will help you set up a website that not only looks great but also drives conversions. Let’s get started on crafting a high-performing fitness website that attracts and retains clients!
Benefits to Create a Fitness Website
Creating a fitness website for your gym comes with numerous benefits beyond just having an online presence. A well-structured website can help you attract more clients, streamline operations, and generate additional revenue. Here are some key advantages of having a fitness website:
- Sell Fitness Products & Merchandise: A website allows you to sell fitness-related products like supplements, workout gear, and branded merchandise. Integrating WooCommerce enables seamless online sales, helping you generate additional income.
- Offer Online Memberships & Subscriptions: With a fitness website, you can offer different membership plans, allowing clients to sign up, renew, or cancel their subscriptions online. This provides convenience and helps you manage memberships effortlessly.
- Attract & Engage More Clients: An engaging website with class schedules, trainer profiles, testimonials, and fitness blogs can attract potential members. SEO optimization ensures your gym appears in local searches, bringing in more foot traffic.
- Online Class Bookings & Scheduling: A website with a booking system enables clients to schedule personal training sessions, group classes, or virtual workouts, reducing administrative tasks and enhancing user experience.
- Promote Your Gym with Digital Marketing: A website acts as a hub for your gym’s online marketing efforts, including social media integration, email campaigns, and Google Ads, helping you reach a wider audience.
- Build a Fitness Community: You can engage members through forums, fitness blogs, and live workout sessions, creating a strong online fitness community.
A well-designed fitness website is a powerful tool to grow your gym and increase revenue effortlessly!
Steps to Create a Fitness Website
Creating a fitness website is a crucial step in building your gym’s online presence, attracting new members, and offering services like online memberships, product sales, and virtual training. The Premium Fitness WordPress Theme by WP Elemento is an excellent choice for crafting a professional, high-performance gym website.
Lets’s walk through the step-by-step process to create a fitness website, from choosing the perfect domain and hosting to launching and marketing your site.
Step 1: Get the Perfect Domain and Hosting
The first step to create a fitness website is selecting the right domain name and hosting provider. Your domain name serves as your website’s digital address (e.g., www.yourgymname.com), allowing visitors to find and access your site. Meanwhile, web hosting is where your website’s files, images, and data are stored, ensuring it remains online and accessible. A well-chosen domain and reliable hosting provider lay the foundation for a successful and high-performing fitness website.
Tips for Choosing a Perfect Domain Name
- Keep it Short and Memorable – A concise, catchy domain name makes it easier for users to remember and type into search engines. Avoid lengthy or complicated names that might confuse visitors.
- Use Keywords – Incorporate relevant words like “fitness,” “gym,” “training,” or “workout” to improve SEO and make it clear what your website is about. For example, EliteFitnessHub.com is an excellent choice.
- Avoid Hyphens and Numbers – Domains with special characters or numbers (e.g., Fit-4-U.com) are harder to remember and prone to typos. Keep it simple for better brand recognition.
- Choose a .com Extension – While there are many domain extensions available (.net, .org, .fitness), .com is the most widely recognized and trusted, making it the best choice for your gym website.
Choosing the Right Hosting Provider

A good hosting provider ensures fast website loading speeds, strong security, and reliable uptime. Here are three top WordPress-optimized hosting providers:
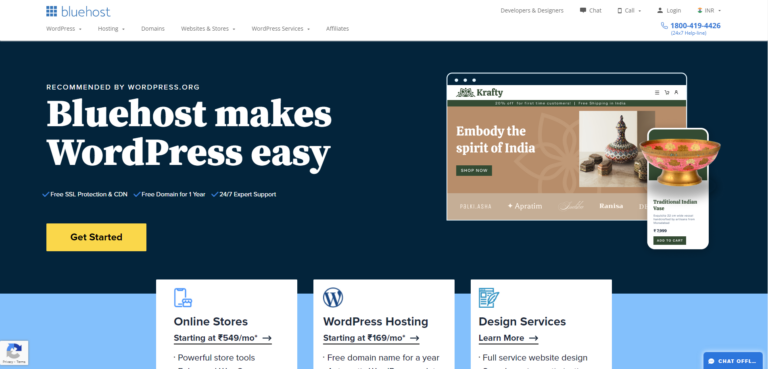
- Bluehost – An affordable and beginner-friendly option, officially recommended by WordPress. It offers free SSL security, domain registration, and 24/7 support.
- SiteGround – Known for high-speed performance and excellent security features, SiteGround is ideal for fitness websites expecting high traffic.
- Hostinger – A budget-friendly hosting service with great speed, free SSL, and a user-friendly dashboard.
For the best performance, opt for a WordPress-optimized hosting plan with SSL security, daily backups, unlimited bandwidth, and a content delivery network (CDN) to ensure a smooth and secure website experience with your best hosting for Woocommerce.
Step 2: Install WordPress on Your Hosting Server

Once you have secured your domain name and hosting, the next crucial step in your journey to create a fitness website is installing WordPress. WordPress is the most powerful and user-friendly content management system (CMS), allowing you to build and manage your website effortlessly. Most modern hosting providers offer a one-click WordPress installation, making the process simple and hassle-free. This installation ensures that your website is set up with the necessary framework to begin designing and customizing your fitness website.
Steps to Install WordPress

- Log into Your Hosting Account: Start by logging into your hosting provider’s dashboard. If you purchased hosting from Bluehost, SiteGround, Hostinger, or any other provider, you will find an intuitive control panel to manage your website settings.
- Navigate to cPanel > Auto Installer and Select WordPress: Once inside your hosting dashboard, locate the cPanel (Control Panel). Scroll down to the Auto Installer section, where you will find the option to install WordPress. Click on the WordPress icon to initiate the installation process.
- Enter Your Website Details: You will now be prompted to enter essential details for your website:
-
- Website Name – The title of your gym’s website (e.g., "Elite Fitness Hub").
- Username & Password – These credentials will be used to access your WordPress dashboard.
- Admin Email – Enter a valid email address for password recovery and site notifications.
- Click Install and Wait for the Process to Complete: After filling in the required information, click the Install button. The system will automatically set up WordPress on your hosting server. This process usually takes a few minutes.
- Log into Your WordPress Dashboard: Once WordPress is installed, you can access your site’s backend by visiting www.yourgymname.com/wp-admin. Enter the username and password you created earlier to log in.
Now, your WordPress site is successfully installed and ready for customization! You can proceed with installing the Personal Trainer WordPress Theme by WP Elemento and designing your gym website to attract more clients. Visit our Blog on How To Install WordPress In Easy Steps for more Brief tutorial.
Step 3: Purchase Personal Trainer WordPress Theme by WP Elemento
To create a fitness website that stands out and effectively attracts clients, choosing the right WordPress theme is crucial. A high-quality theme ensures your website is visually appealing, user-friendly, and feature-rich. The Personal Trainer WordPress Theme by WP Elemento is the perfect solution for gym owners, personal trainers, and fitness studios looking to establish a strong online presence. This theme is designed specifically for the fitness industry, offering all the necessary tools to showcase your services, sell products, and engage potential clients.
Why Choose the Personal Trainer WordPress Theme by WP Elemento?
- Optimized for Elementor (Easy Drag-and-Drop Editing): With Elementor page builder compatibility, this theme allows effortless website customization. You can simply drag and drop elements to design stunning pages without coding. Whether you need to modify the homepage, class schedules, or membership plans, Elementor makes it incredibly easy to update your site in real time.
- WooCommerce Ready (Sell Gym Products and Memberships): Monetizing your fitness website is seamless with WooCommerce integration. You can sell gym memberships, workout gear, supplements, training programs, and more directly from your site. Secure payment gateways like PayPal and Stripe ensure a smooth checkout experience for customers.
- Mobile-Responsive & SEO-Friendly (Ensuring a Great User Experience): In today’s digital world, a mobile-friendly website is essential. This theme is fully responsive, meaning it looks perfect on desktops, tablets, and smartphones. Additionally, its SEO-friendly structure ensures your website ranks higher on search engines, increasing visibility and attracting more gym members.
- Comes with Pre-Built Templates (For Easy Website Setup): The theme includes pre-designed templates tailored for fitness businesses. These ready-to-use layouts allow you to quickly launch your website with professional-looking pages for services, trainer profiles, testimonials, class schedules, and contact forms.
How to Purchase the Personal Trainer WordPress Theme
- Visit the WP Elemento Website – Go to WP Elemento’s official website and locate the Personal Trainer WordPress Theme in the theme marketplace.
- Click Buy Now and Complete the Purchase – Choose your preferred pricing plan and proceed to checkout. Secure payment options ensure a hassle-free transaction.
- Download the Theme ZIP File – Once purchased, log into your WP Elemento account and download the theme ZIP file from your dashboard.
After purchasing, you are ready to install the theme and begin customizing your fitness website effortlessly!
Step 4: Install and Activate the Theme in Your WordPress Dashboard
Now that you have WordPress installed on your hosting server, the next crucial step to create a fitness website is installing and activating the Personal Trainer WordPress Theme by WP Elemento. This theme is designed specifically for gyms, personal trainers, and fitness centers, offering a sleek, professional, and highly customizable layout which makes it the best fitness WordPress themes. Installing this theme will give your website a solid foundation, complete with essential features like class schedules, membership options, and eCommerce functionality.
Steps to Install the Theme

- Access your WordPress dashboard: The first step is to log into your WordPress admin panel. Simply enter your domain followed by /wp-admin (e.g., www.yourgymwebsite.com/wp-admin) in your browser, You will then be prompted to enter your username and password.
- Navigate to Appearance > Themes > Add New: From the dashboard, select the Appearance tab. Click on Themes, then select Add New at the top of the page. It will take you to the theme directory for WordPress.
- Click Upload Theme and Select the ZIP File: Since the Personal Trainer WordPress Theme by WP Elemento is a premium theme, it won’t be available in the free WordPress theme directory. Upon purchasing the theme, click the Upload Theme button and select the ZIP file you downloaded.
- Click Install Now, then Activate the Theme: Once the file has been uploaded, click Install Now and wait for the installation to finish. Once the theme is successfully installed, click Activate to apply the theme to your website.
Congratulations! Your fitness website is now set up with the premium theme and ready for further customization. The next steps will involve importing demo content, adjusting branding elements, and configuring essential features to make your website fully functional and visually appealing.
Step 5: Import Demo Content

Once you have installed and activated the Personal Trainer WordPress Theme by WP Elemento, the next crucial step in the process to create a fitness website is importing the demo content. This step allows you to set up your website exactly as shown in the theme’s demo, saving you time and effort in designing layouts from scratch. Instead of manually creating pages, adding sections, and configuring settings, the Import Demo Content feature automates the process, giving you a fully functional fitness website within minutes.
One of the biggest advantages of importing demo content is that it automatically installs and activates essential plugins required for your gym website. These plugins include:
- BMI Calculator – Allows users to calculate their body mass index, an essential tool for fitness tracking.
- WooCommerce – Enables the sale of gym memberships, workout plans, supplements, and fitness gear.
- Contact Form 7 – Helps in collecting leads and inquiries from potential gym members.
- Elementor – The drag-and-drop page builder that makes customizing your fitness website easy and code-free.
Steps to Import the Demo Content
- Navigate to Get Started: Log into your WordPress dashboard and go to Appearance > Theme Name. This section provides the demo import options provided by the theme.
- Enter Your License Key: You will need to enter the license key that came with your theme purchase. This validates your theme and ensures you receive future updates and support.
- Click "Import Demo" to Begin the Process: Once the license key is verified, click the Import Demo button. The system will begin:
-
- Installing and activating required plugins like BMI Calculator, WooCommerce, Contact Form 7, and Elementor.
- Importing pre-designed demo pages, layouts, and images, ensuring your website looks just like the theme demo.
- Wait for the Import Process to Complete:The demo import process may take a few minutes, depending on your hosting speed. During this time, the system will automatically configure settings, import media files, and set up navigation menus.
Once the import is successfully completed, your website will look exactly like the demo version, complete with homepages, service sections, trainer profiles, class schedules, and contact forms. This makes customization much easier, as you can simply replace the demo content with your own text, images, and branding instead of building everything from scratch. If you want a detailed Guide for Installing BMI calculator on your website you can follow our Detailed Guide on how to Add a BMI Calculator in WordPress.
By following this step, you create a fitness website that is visually appealing, fully functional, and ready for further personalization!
Step 6: Customize the Content and Images

Now that the demo content is imported, the next crucial step to create a fitness website is customizing the content, images, and branding to make it unique to your gym. The demo provides a great starting point, but it’s essential to replace generic text and stock images with content that reflects your gym’s identity. This ensures your website looks professional, engages visitors, and builds trust with potential clients.
Customizing Pages, Header & Footer
To begin, log into your WordPress dashboard and navigate to Pages. Select the page you want to modify and click Edit with Elementor to enter the drag-and-drop editor. Here, you can:
- Update text, fonts, and colors to align with your gym’s branding.
- Replace placeholder images and banners with high-quality photos of your facility, trainers, and clients.
- Adjust buttons, CTAs (Call-to-Actions), and animations to enhance user experience.
To edit the header and footer, go to Appearance > Customize. Here, you can:
- Upload your gym’s logo and adjust the navigation menu.
- Modify the footer layout to include contact details, social media links, and quick access to important pages.
Updating Homepage Sections
Your homepage is the first impression visitors get of your gym. Make it compelling by:
- Replacing demo images with professional, high-resolution fitness images.
- Adding details about your gym’s facilities, trainers, and membership options.
- Showcasing client testimonials and success stories to build credibility and trust.
By customizing every aspect, you create a fitness website that is visually appealing, engaging, and optimized for conversions. For more detailed Guide visit our Blog on How to customize WordPress themes.
Step 7: Configure WooCommerce for Selling Products & Memberships
One of the biggest advantages of using the Personal Trainer WordPress Theme is its seamless integration with WooCommerce, allowing you to sell gym memberships, fitness products, and training plans online. This feature transforms your fitness website into a fully functional eCommerce store, providing a hassle-free experience for your clients to purchase memberships, book training sessions, and buy fitness merchandise.
Steps to Set Up WooCommerce

Before adding products, you need to configure WooCommerce settings. Follow these steps:
- Navigate to WooCommerce > Settings in your WordPress dashboard.
- Under the General tab, set up your store location, currency, and tax settings according to your business location.
- In the Payments section, enable preferred Woocommerce payment methods like PayPal, Stripe, or credit/debit cards, ensuring secure transactions.
- Configure Shipping settings based on your delivery policy, allowing customers to choose shipping methods for fitness products.
Adding Fitness Products & Memberships

Now, you can start adding products and membership plans:
- Go to Products > Add New in WooCommerce.
- Enter a product name, description, price, and high-quality images.
- Select the appropriate Product Type, such as Membership for gym subscriptions.
- Click Publish, and your product will be available for customers to purchase.
By integrating WooCommerce, your fitness website will generate revenue effortlessly, making it easy for users to sign up for memberships, book training sessions, and shop for fitness gear all from a single online platform!
Step 8: Configure Email Settings for Newsletter & Lead Generation

One of the most effective ways to grow your gym’s client base and keep members engaged is by collecting leads through a newsletter subscription form. When you create a fitness website, it’s essential to set up an email marketing system that allows visitors to sign up for updates, promotions, and special offers. This helps in building a strong community, improving customer retention with woocommerce abandoned cart email and increasing conversions.
The best way to integrate a lead generation system in WordPress is by using Contact Form 7 Plugin, a simple yet powerful plugin that allows you to create customized forms for lead collection. Here’s how you can configure it:
Steps to Configure Contact Form 7 for Lead Generation

- Go to Contact > Add New in WordPress – In your WordPress dashboard, navigate to Contact Form 7 and create a new form.
- Customize the form fields – Include fields like Name, Email, and Phone Number to collect essential client details.
- Set up an auto-reply email – Configure an automated thank-you message to confirm successful form submission, making visitors feel valued.
- Embed the form on the homepage and landing pages – Place the form in strategic locations like the homepage, membership page, and blog section to maximize sign-ups.
Once configured, your website can capture leads, send newsletters, and engage potential customers, helping your gym expand its reach and grow its client base effortlessly!
Step 9: Test Your Website and Publish
Before making your fitness website live, it is essential to test its performance and functionality to ensure a smooth user experience. A well-optimized and error-free website enhances visitor engagement, credibility, and search engine rankings. Testing helps identify and resolve broken links, layout issues, speed problems, and payment errors, ensuring your gym members have a seamless browsing experience.
Checklist Before Publishing
- Test All Pages and Links for Errors: Click through every page, menu, and call-to-action button to ensure all links work properly. A broken link can frustrate users and harm your website’s SEO. Verify that contact forms submit correctly and confirmation emails are received.
- Check Mobile Responsiveness: Since most users access websites via smartphones, your site must display correctly on all devices. Use tools like Google’s Mobile-Friendly Test to ensure that text is readable, images are scaled properly, and navigation is intuitive.
- Test WooCommerce Transactions: If you’re selling gym memberships, fitness products, or online training programs, perform a test purchase using different payment methods to confirm smooth checkout, order confirmation, and email notifications.
- Ensure Fast Loading Speed: A slow website can lead to high bounce rates. Test your website with GTmetrix or Google PageSpeed Insights and optimize images, minimize plugins, and enable caching for better performance.
Once everything functions perfectly, click “Publish”, and your fitness website will be live, ready to attract new gym members and grow your business!
Step 10: Start Marketing Your Website
Now that your fitness website is live, it’s time to attract clients and grow your business by implementing effective marketing strategies. A well-marketed website can help you increase gym memberships, sell fitness products, and establish your brand’s authority in the fitness industry.
- SEO Optimization: Search engine optimization (SEO) is crucial for ranking higher on Google. Optimize your website with relevant keywords like “Create a Fitness Website”, “best gym near me,” and “fitness membership plans.” Ensure your content is well-structured, images are optimized, and pages load quickly to improve your ranking. Also, create a blog section where you can post fitness tips, workout routines, and client success stories to drive organic traffic.
- Social Media Promotion: Leverage platforms like Instagram, Facebook, and YouTube to share engaging content, including workout videos, gym transformations, and testimonials. Use hashtags, collaborate with fitness influencers, and encourage members to share their experiences to increase visibility.
- Email Marketing: Build an email list by offering free workout guides or discounts on memberships. Send newsletters, fitness tips, and special promotions to keep subscribers engaged and encourage sign-ups.
- Google Ads & Facebook Ads: Running targeted ads on Google and Facebook helps you reach potential clients in your area. Use geo-targeting, audience segmentation, and compelling visuals to attract leads.
With effective marketing, your fitness website will drive traffic, increase memberships, and grow your gym business!
Conclusion
Creating a fitness website for your gym is a powerful way to attract clients, streamline operations, and boost revenue. We’ve explored the key benefits of having a fitness website, from selling products and memberships to offering online bookings and building a strong fitness community. Additionally, we’ve walked through the step-by-step process to create a fitness website using the Personal Trainer WordPress Theme by WP Elemento, covering everything from choosing the right domain and hosting to customizing content and marketing your site effectively.
By following these steps, you can create a professional, engaging, and conversion-optimized fitness website that helps your gym stand out with our Premium WordPress elementor themes. Whether you're a small fitness studio or a large gym, an online presence will enhance your reach and customer engagement. Now, it’s time to launch your website and start growing your gym business!

