As a website owner or blogger, you may have heard about the importance of search engine optimization (SEO) to drive traffic to your website and improve its visibility. And if you’re using WordPress as a CMS, you may have also heard of the Yoast SEO plugin, one of the most popular and widely used SEO plugins.
Yoast SEO is a free plugin that helps you optimize your website for search engines by providing various features such as keyword optimization, content analysis, XML sitemaps, and more. It’s easy to install and configure, making it a must-have plugin for any WordPress site.
But where do you start with Yoast SEO? What are the key features and settings you need to be aware of? And how can you make the most of this powerful tool to improve your website’s SEO?
In this blog post, we will walk you through the process of installing and configuring the Yoast SEO plugin in WordPress, step-by-step. We’ll cover everything from setting up your account to configuring the plugin’s key features and settings. You’ll learn how to optimize your website’s content for search engines, improve your website’s visibility in search results, and boost your website’s traffic and engagement.
Whether you’re a beginner or an experienced WordPress user, this guide will help you get started with Yoast SEO and take your website’s SEO to the next level. So, let’s get started and make your website more SEO-friendly with Yoast SEO!
Yoast SEO Plugin In WordPress
Yoast SEO is a popular plugin for WordPress websites that helps optimize your site’s content for search engines. It was created by Joost de Valk and his team at Yoast BV. Yoast SEO provides a wide range of features that help to optimize your website, such as:
- Content analysis: Yoast SEO analyzes the content of your pages and posts, looking for factors that might impact their visibility in search engine results. It evaluates factors such as keyword usage, readability, and content length.
- Keyword optimization: You can use Yoast SEO to set a focus keyword for each page or post on your site. The plugin will then analyze your content to ensure that your keyword is used in the appropriate places and density.
- Title and meta description optimization: Yoast SEO allows you to customize the title and meta description that will appear in search engine results for each page or post on your site. It provides a preview of how your title and description will appear in search results, and it gives you tips to improve them.
- XML Sitemaps: Yoast SEO creates XML sitemaps for your website, assisting search engines in crawling and indexing your content.
- Social media integration: The plugin allows you to specify how your pages and posts will appear on social media sites such as Facebook and Twitter, including customizing the image and description that will appear.
- Redirects: Yoast SEO helps you manage redirects for old pages or broken links on your site, ensuring that visitors are always directed to the appropriate content.
- Internal linking suggestions: Yoast SEO analyzes your content and suggests internal links to other pages or posts on your site, helping to improve your site’s overall structure and organization.XML Sitemaps: Yoast SEO creates XML sitemaps for your website, assisting search engines in crawling and indexing your content.
Benefits Of Using The Yoast SEO Plugin In WordPress
- Improved search engine visibility: By optimizing your content using Yoast SEO, you can improve your website’s visibility in search engine results, making it more likely that potential customers or clients will find your site.
- Better content quality: Yoast SEO helps you to create high-quality content that is both readable and optimized for search engines, ensuring that your website delivers value to your visitors.
- Increased website traffic: By improving your website’s search engine visibility and quality of content, Yoast SEO can help drive more traffic to your site, which can lead to more business and revenue.
- Time-saving: Yoast SEO provides a range of automated features, such as generating sitemaps and analyzing content, which can save you time and effort when managing your website’s optimization.
- Easy to use: Yoast SEO is user-friendly and easy to set up, even for those without a technical background. The plugin provides clear guidance and tips to help you optimize your content effectively.
Overall, Yoast SEO is a valuable tool for anyone looking to improve their website’s search engine visibility and optimize their content for both visitors and search engines.
Installing The Yoast SEO Plugin
Installing Yoast SEO Plugin in WordPress is a simple process that can be completed in a few steps. Yoast SEO is a popular WordPress plugin that helps improve your website’s search engine optimization. Here’s how to install the Yoast SEO plugin in WordPress:
Step 1: Log in to your WordPress website
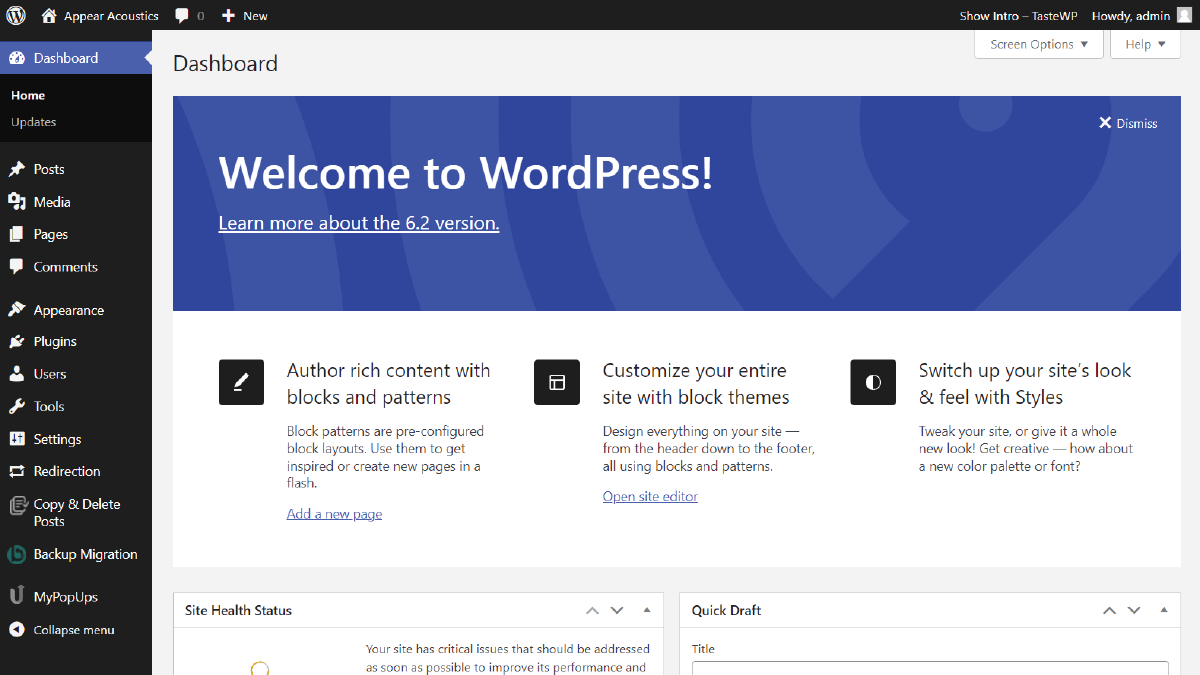
To begin, you need to log in to your WordPress website. Navigate to the dashboard once you have logged in.
Step 2: Navigate to Plugins
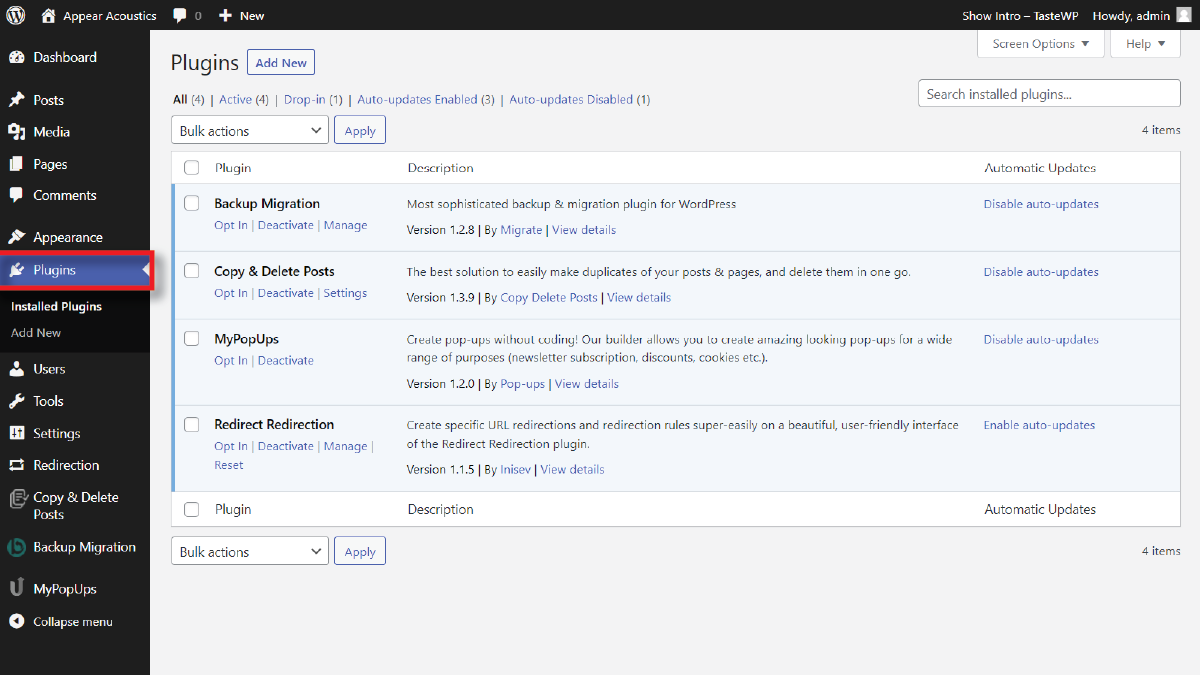
Next, click on the ‘Plugins’ tab on the left-hand side of the dashboard. You will be taken to the plugins page.
Step 3: Click on 'Add New'
Once you are on the plugins page, click on the ‘Add New’ button at the top of the page. You will be taken to the Add Plugins page.

Step 4: Search for Yoast SEO
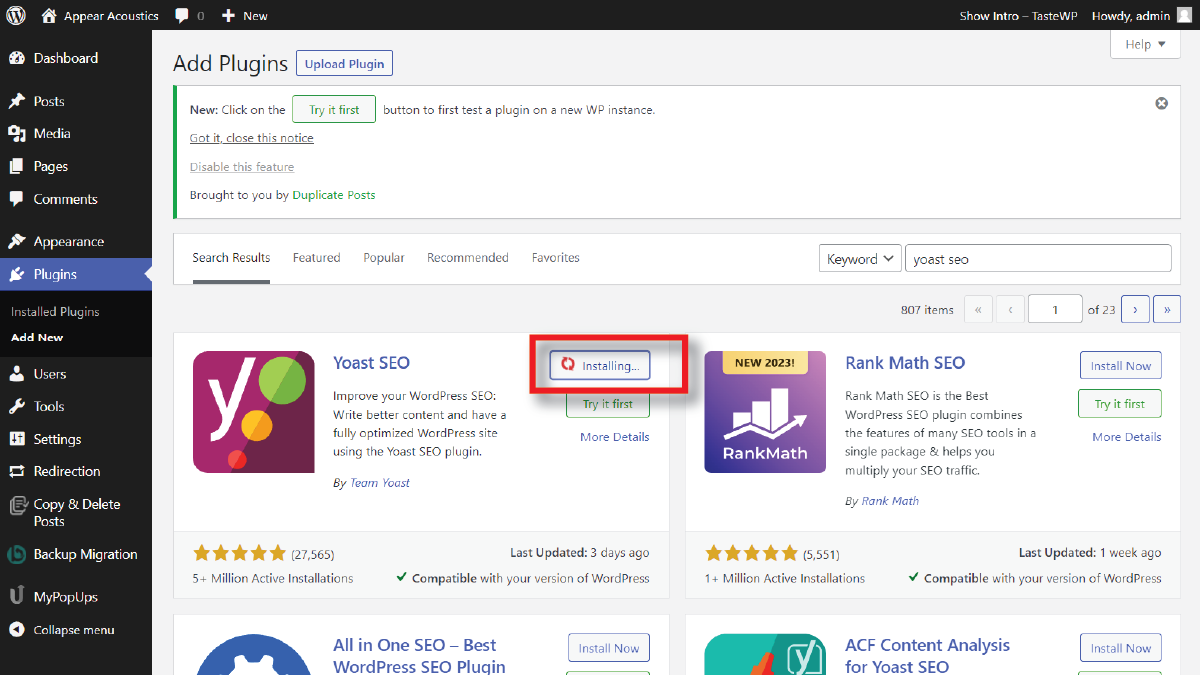
In the search bar at the top right corner of the Add Plugins page, type ‘Yoast SEO’ and hit enter. The search results will appear on the page.
A. Install Yoast SEO
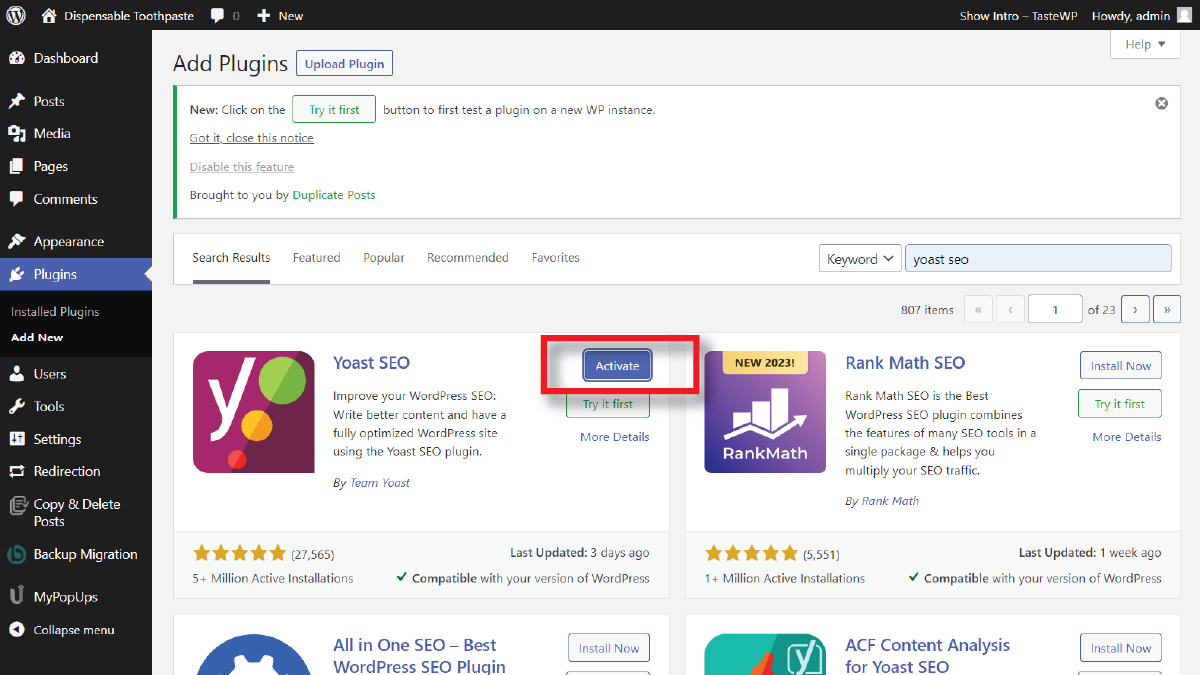
Once you find Yoast SEO in the search results, click on the ‘Install Now’ button to install the plugin. WordPress will now download and install the plugin on your website.
B. Activate Yoast SEO
Once the plugin is installed, click on the ‘Activate’ button to activate Yoast SEO. You can now start using Yoast SEO to optimize your website content for search engines. After activating Yoast SEO, you can configure the plugin’s settings to suit your website’s needs.
C. Configure Yoast SEO Settings
Once you have installed and activated the Yoast SEO plugin in WordPress website, there are several steps you need to follow to configure it for optimal performance The following is a detailed guide on how to do it:
- Enable and configure the general settings
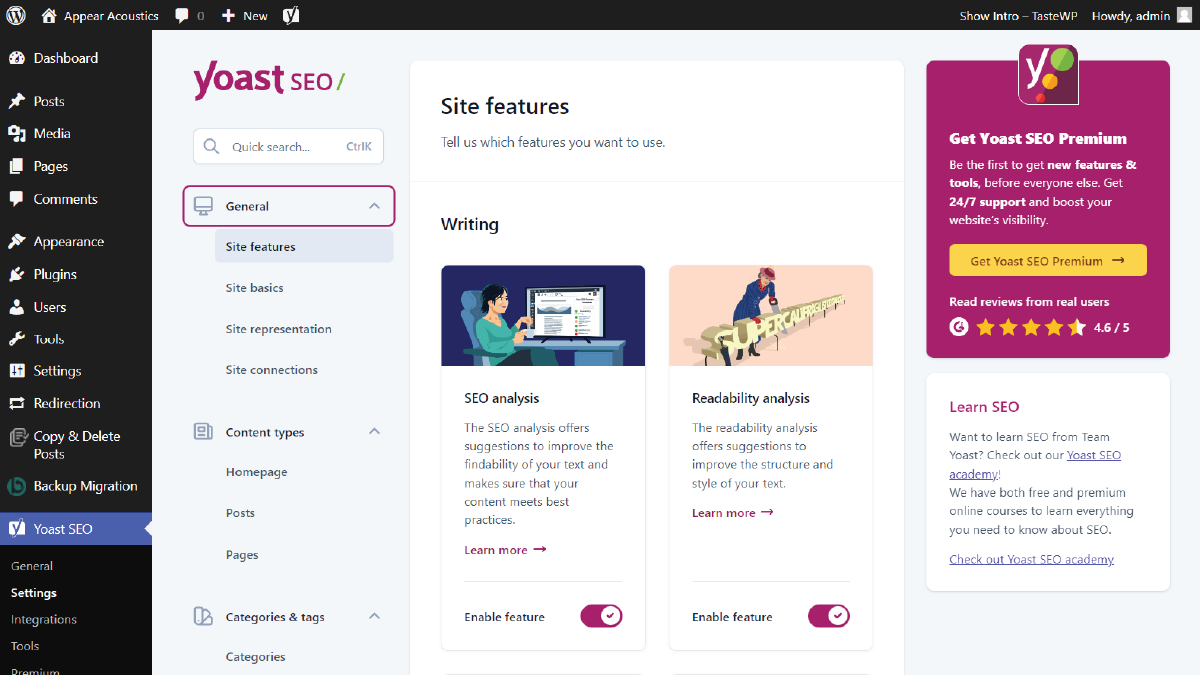
After installing and activating Yoast SEO Plugin in WordPress, you need to enable and configure the general settings. To do this, go to the Yoast SEO dashboard, then click on the “General” tab. In this tab, you will see a list of settings that you can configure. In the first setting, you will find the option for “SEO analysis.” This option is enabled by default, but you can disable it if you don’t want to use it.
The next setting is the “Readability analysis” option. This option is also enabled by default, and it checks the readability of your content. You can disable it if you want to, but it’s a good idea to keep it enabled to ensure your content is easy to read.
The next setting is the “Cornerstone content” option. This option is disabled by default, but you can enable it if you want to mark some of your content as cornerstone content. Cornerstone content is the most important content on your website and should be given more attention by search engines.
The next setting is the “Text link counter” option. This option is enabled by default, and it counts the number of internal and external links in your content. In case you don’t want to use it, you can disable it.
The last setting is the “Admin bar menu” option. This option is enabled by default, and it adds a Yoast SEO menu to the WordPress admin bar. Disabling it is an option if you’d rather not use it.
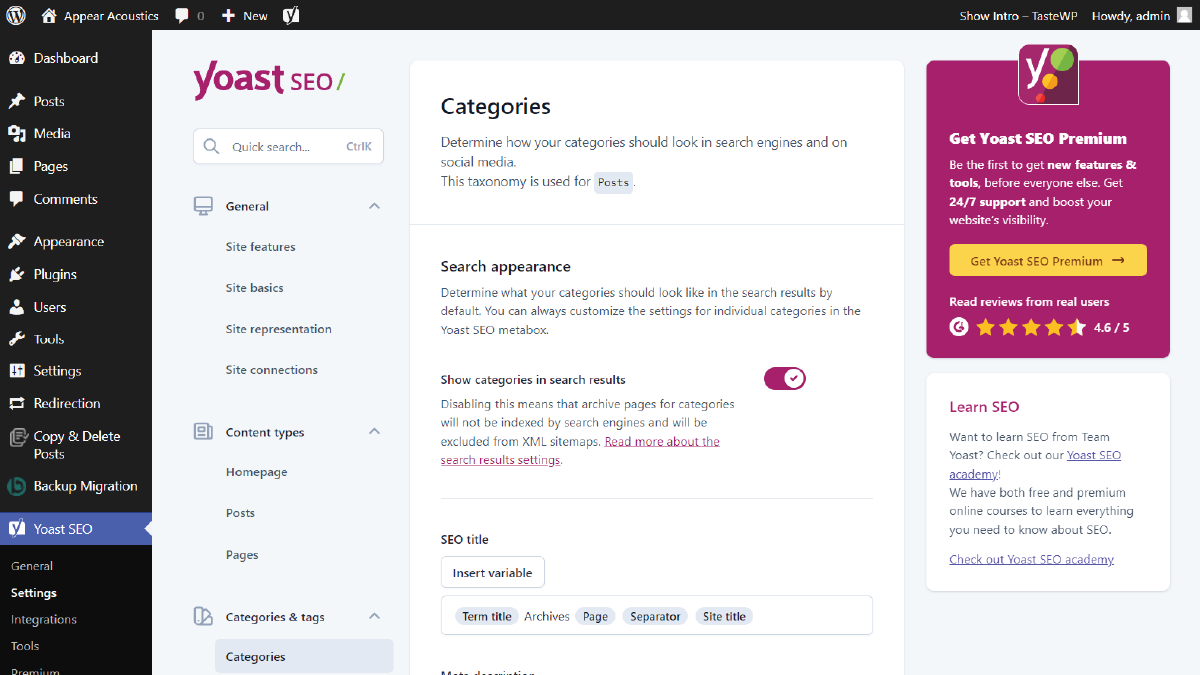
- Configure the search appearance settings
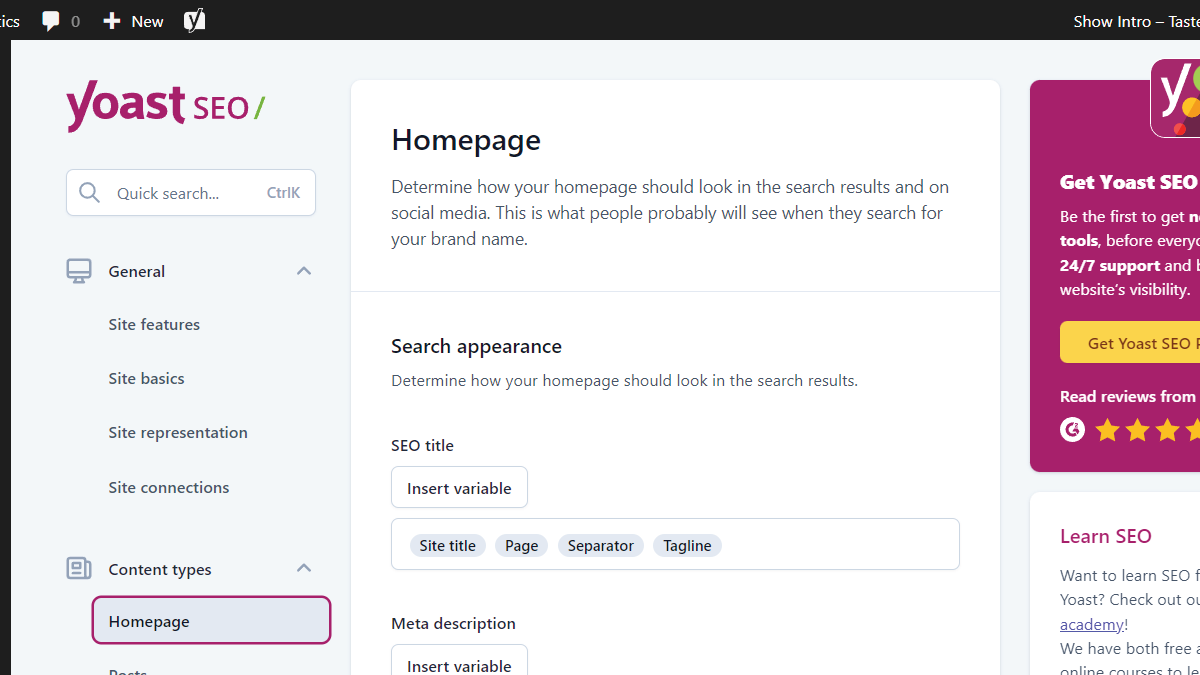
The next step is to configure the search appearance settings. To do this, go to the “Search Appearance” tab on the Yoast SEO dashboard. In this tab, you will see a list of settings that you can configure.
The first setting is the “General” option. This option allows you to set the title separator, which is the character used to separate the title and the site name in the search results. You can also set the meta description template, which is the text that appears below the title in the search results.
The next setting is the “Content types” option. This option allows you to configure the title and meta description templates for each content type on your website, such as posts, pages, and custom post types.
The next setting is the “Taxonomies” option. This option allows you to configure the title and meta description templates for each taxonomy on your website, such as categories and tags.
The next setting is the “Archives” option. This option allows you to configure the title and meta description templates for archive pages on your website, such as the date and author archives.
The last setting is the “Other” option. This option allows you to configure the title and meta description templates for 404 pages and the homepage.
- Configure the social settings
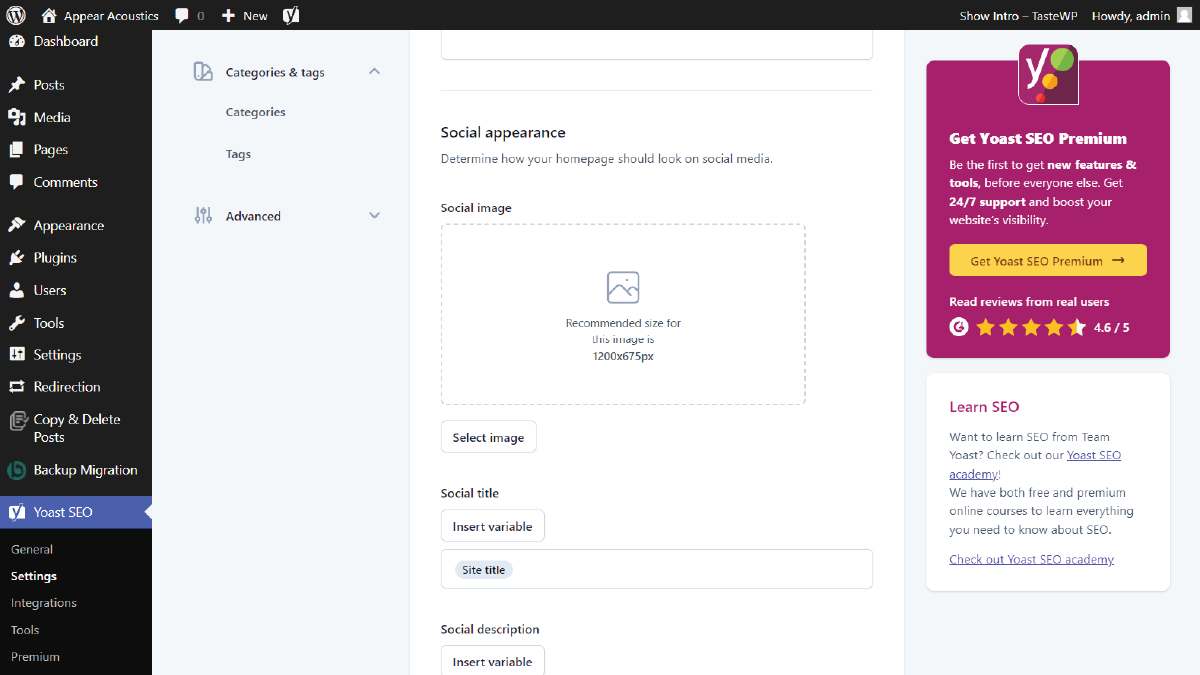
The next step is to configure the social settings. To do this, go to the “Social” tab on the Yoast SEO dashboard. In this tab, you will see a list of settings that you can configure.
The first setting is the “Accounts” option. This option allows you to connect your website to your social media accounts, such as Facebook, Twitter, and LinkedIn.
The next setting is the “Facebook” option. This option allows you to configure how your website appears on Facebook, such as the image, title, and description.
The next setting is the “Twitter” option. This option allows you to configure how your
websites appear on Twitter, such as the card type, title, description, and image.
The last setting is the “Pinterest” option. This option allows you to configure how your website appears on Pinterest, such as the image, title, and description.
- Configure the XML sitemap settings
The next step is to configure the XML sitemap settings. To do this, go to the “XML Sitemaps” tab on the Yoast SEO dashboard. In this tab, you will see a list of settings that you can configure.
The first setting is the “General” option. This option allows you to enable or disable the XML sitemap functionality. You can also choose which post types and taxonomies to include in the sitemap.
The next setting is the “User sitemap” option. This option allows you to enable or disable the user sitemap, which is a sitemap of all the author pages on your website.
The next setting is the “Excluded posts” option. This option allows you to exclude specific posts or pages from the XML sitemap.
The last setting is the “Additional pages” option. This option allows you to add additional pages to the XML sitemap, such as custom pages or pages from other plugins.
- Configure the advanced settings
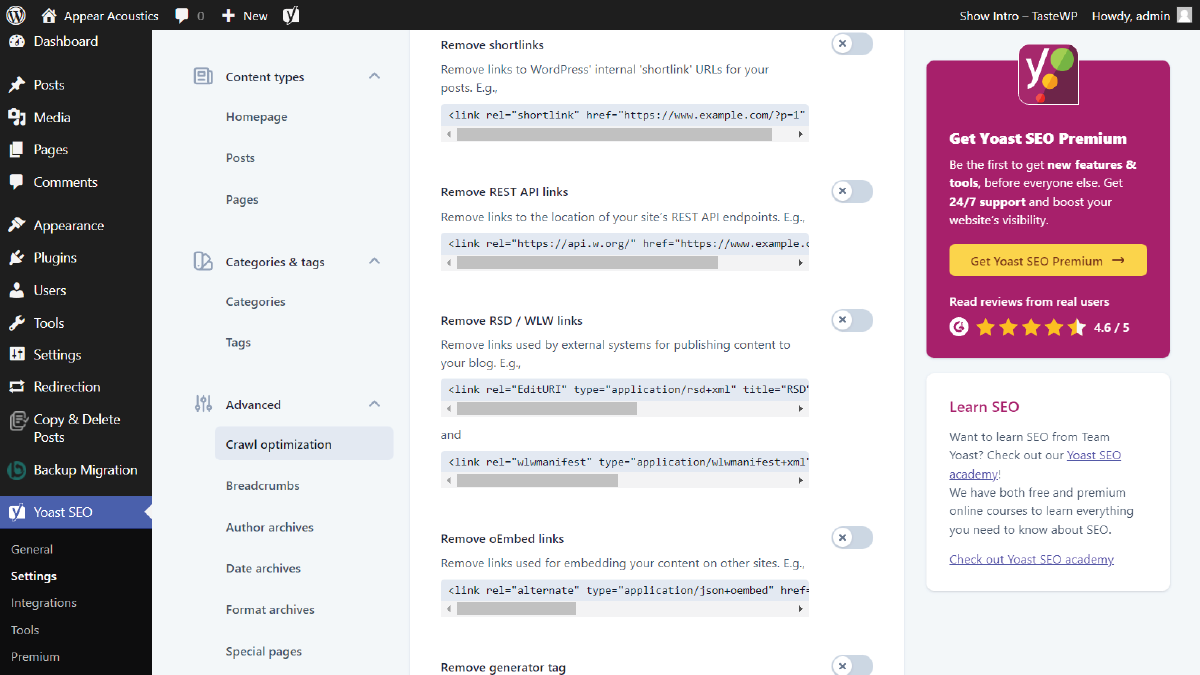
In the final step, the advanced settings are configured. To do this, go to the “Advanced” tab on the Yoast SEO dashboard. In this tab, you will see a list of settings that you can configure.
The first setting is the “Breadcrumbs” option. This option allows you to enable or disable breadcrumbs on your website. Elementor Breadcrumbs are a navigational aid that shows users the path to the current page.
The next setting is the “Permalinks” option. This option allows you to configure the permalinks for your website. A permalink is a URL for a post or page on your website.
The next setting is the “RSS” option. This option allows you to add content to your RSS feed, such as a link back to your website or a message for your subscribers.
The last setting is the “Tools” option. This option allows you to import or export your settings, reset the plugin to its default settings, or edit your robots.txt and .htaccess files.
Conclusion
In conclusion, Yoast SEO Plugin in WordPress is an essential plugin for anyone who wants to improve their website’s search engine rankings. This plugin works phenomenally well with all WordPress Elementor Themes by WP Elemento. By using this plugin, you can optimize your website’s content, meta tags, and other on-page factors to help search engines understand your content better.
Throughout this guide, we’ve learned about the various features of Yoast SEO and how to install and configure the plugin on your WordPress website. We’ve discussed how to set up your site’s title and meta description, how to configure your XML sitemap, and how to use the plugin’s advanced settings to optimize your content.
With Yoast SEO, you can create SEO-friendly content and improve your website’s visibility in search engine results pages. The plugin offers a range of tools and features to help you optimize your website’s content and structure, so you can achieve better rankings and attract more traffic to your site.
In addition, Yoast SEO is easy to use and offers a user-friendly interface, so you don’t need to be an SEO expert to get the most out of it. Whether you’re a beginner or an experienced webmaster, Yoast SEO is a must-have plugin for any WordPress website. WordPress Plugins for Blog are a must-have for any WordPress site, given their ease of installation and configuration. So, install Yoast SEO Plugin in WordPress website today and start optimizing your content for search engines!
The WordPress theme bundle, equipped with premium Elementor themes, seamlessly integrates with the Yoast SEO plugin. This dynamic combination streamlines website creation and enhances search engine optimization. With intuitive design options and robust SEO tools, users can craft visually stunning websites that rank effectively on search engines.


