If you’re a WordPress user, you’re probably already familiar with Elementor – the popular WordPress page builder plugin that allows you to create stunning custom pages without any coding knowledge. Whether you’re a blogger, business owner, or freelancer, Elementor can help you create beautiful, professional-looking pages that are tailored to your unique needs.
But if you’re new to Elementor, it can be overwhelming to figure out where to start. With so many customization options and settings to choose from, it’s easy to get lost in the details and lose sight of your end goal. That’s why we’ve put together this guide to help you get started with creating beautiful custom pages in WordPress using Elementor.
In this guide, we’ll walk you through the steps of creating a custom page from scratch using Elementor. We’ll cover everything from setting up your page layout to selecting the right design elements and customizing your page’s style to match your brand. Whether you’re looking to create a landing page, a product page, or a blog post, we’ve got you covered.
One of the great things about Elementor is that it’s incredibly flexible and customizable. With Elementor, you can create almost any kind of page you can imagine, using a wide range of design elements, widgets, and templates. Plus, Elementor is constantly updating and improving its features, so you can be sure that you’re always working with the latest and greatest tools.
So, if you’re ready to take your WordPress pages to the next level, follow along with this guide to learn how to create beautiful custom pages in WordPress using Elementor.
What Is A Custom Page In WordPress?
In WordPress, a custom page refers to a unique web page that is designed and developed to meet specific requirements and goals of a website. It is different from the standard pages that come with WordPress, which have predefined layouts and functionalities.
A custom page can be created in WordPress in several ways. One of the most popular methods is by using a page builders plugin, such as Elementor, Beaver Builder, or Divi. These plugins provide an intuitive drag-and-drop interface that allows users to create custom pages without any coding knowledge.
Another way to create custom pages in WordPress is by coding them manually using HTML, CSS, and PHP. This method requires some coding skills but gives complete control over the design and functionality of the page.
Why Is There A Need For A Custom Page?
Custom pages in WordPress can serve a variety of purposes depending on the needs and goals of the website. The main purpose of customizing a page is to create a unique and personalized user experience for visitors to the site. This can help to establish brand identity and promote the website’s message or mission.
One of the most common reasons for customizing a page is to create a landing page for a specific marketing campaign or product launch. This page can be designed to focus on the specific benefits of the product or service, with a call to action that encourages visitors to make a purchase or sign up for a newsletter. A landing page can also be used to capture leads by offering a free resource or download in exchange for contact information.
Another purpose of customizing a page is to improve the website’s overall usability and accessibility. By creating a custom layout or design, website owners can ensure that important information is easy to find and that the site is optimized for mobile devices. Customizing the page can also make it more visually appealing and engaging, which can help to keep visitors on the site for longer periods of time.
Customizing pages can also be useful for creating a membership or subscription-based website. By adding custom login and registration pages, website owners can create a secure area of the site where users can access premium content or exclusive offers. Customizing the pages can also help to streamline the user experience, making it easier for users to navigate and find the content they’re looking for.
In addition to these purposes, customizing pages can also be helpful for improving the website’s search engine optimization (SEO). By optimizing the page content, title tags, and meta descriptions, website owners can improve their chances of ranking higher in search engine results pages (SERPs). Customizing pages can also make it easier for search engines to crawl and index the site, which can help to improve its overall visibility and ranking.
Overall, custom pages in WordPress can serve a wide range of purposes, from improving website usability and accessibility to creating targeted marketing campaigns and improving search engine rankings. By taking the time to customize pages and tailor the user experience, website owners can create a site that is engaging, informative, and easy to navigate, which can help to drive traffic and increase conversions.
How To Create Custom Pages In WordPress With Elementor?
WordPress is a versatile and customizable platform that allows you to create websites and blogs with ease. One of the most popular WordPress page builders is Elementor, which provides an intuitive drag-and-drop interface for creating custom pages. Here are the steps to create custom pages in WordPress with Elementor.
Step 1: Install Elementor And Elementor Pro
To create custom pages in WordPress with Elementor, the first step is to install Elementor and Elementor Pro. Elementor is a drag-and-drop page builder plugin for WordPress that allows users to create custom page layouts without needing to know how to code. Elementor Pro is the premium version of the plugin that offers additional features and functionality.
To install Elementor and Elementor Pro, first, log in to your WordPress dashboard and navigate to the “Plugins” section. Click on the “Add New” button and then search for “Elementor” in the search bar. Click on the “Install Now” button next to the Elementor plugin, and then click “Activate” to activate the plugin.
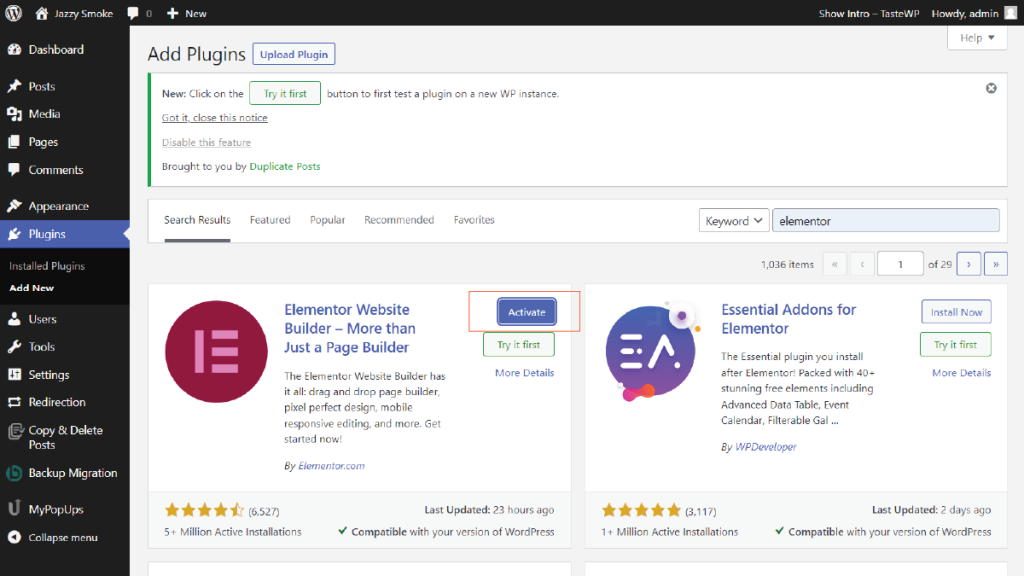
Once the Elementor plugin is installed and activated, you can proceed to install Elementor Pro. To do this, you will need to purchase a license for the plugin from the Elementor website. Once you have purchased the license, you will receive a download link for the plugin.
To install Elementor Pro, navigate to the “Plugins” section in your WordPress dashboard and click on the “Add New” button. Next, click on the “Upload Plugin” button and then select the Elementor Pro ZIP file you downloaded from the Elementor website. Click on the “Install Now” button and then click “Activate” to activate the plugin.
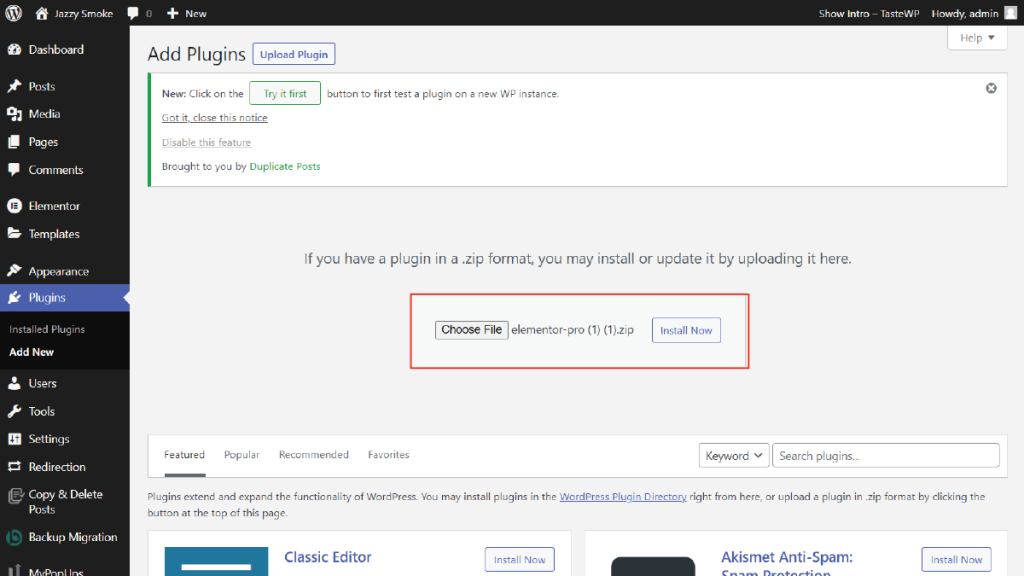
After installing and activating both Elementor and Elementor Pro, you can start creating custom pages in WordPress using the Elementor page builder. To do this, navigate to the “Pages” section in your WordPress dashboard and then click on the “Add New” button. This will open the WordPress editor, where you can choose to edit the page with Elementor by clicking on the “Edit with Elementor” button.
Once you are in the Elementor editor, you can drag and drop various elements onto your page, such as text boxes, images, videos, and more. You can also customize the layout of your page by using the Elementor interface to adjust the placement of elements and the overall design of the page.
In conclusion, installing Elementor and Elementor Pro is the first step in creating custom pages in WordPress with Elementor. Once you have installed and activated the plugins, you can start using the Elementor page builder to create custom pages with ease.
Once you are in the Elementor editor, you can drag and drop various elements onto your page, such as text boxes, images, videos, and more. You can also customize the layout of your page by using the Elementor interface to adjust the placement of elements and the overall design of the page.
Overall, installing Elementor, Elementor Pro and Essential Addons for Elementor is the first step in creating custom pages in WordPress with Elementor. Once you have installed and activated the plugins, you can start using the Elementor page builder to create custom pages with ease.
Step 2: Choose A Template Or Create Your Own
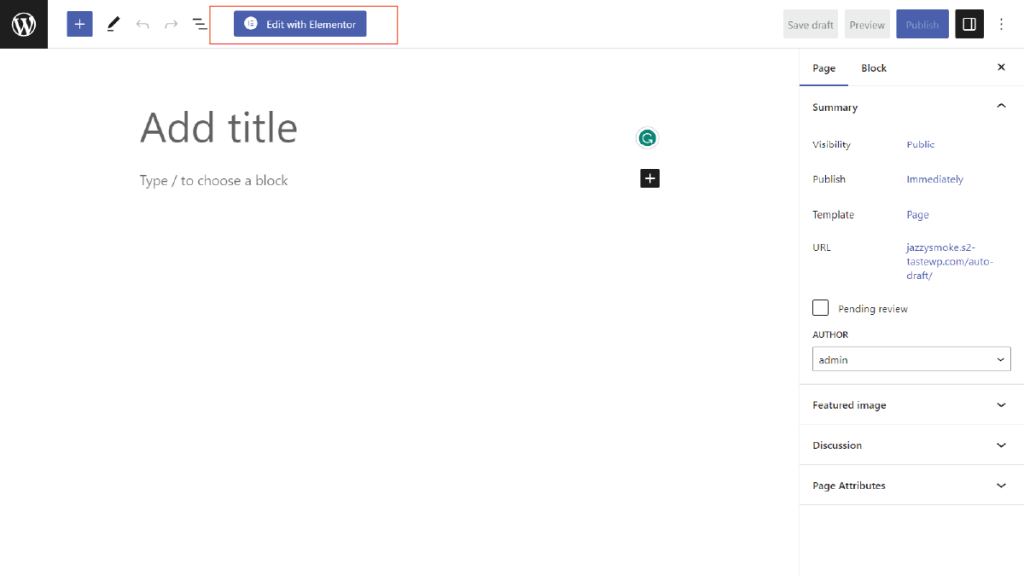
After installing and activating Elementor and Elementor Pro, the next step in creating custom pages in WordPress with Elementor is to choose a template or create your own.
Elementor comes with a library of pre-designed templates that you can use as a starting point for your custom pages. To access these templates, simply click on the “Templates” button in the Elementor editor. From there, you can browse through the available templates and choose one that best suits your needs.
Once you have selected a template, you can customize it to your liking using the Elementor editor. You can modify the text, images, and other elements on the page, as well as change the layout and design of the page.
Alternatively, you can also create your own custom page from scratch using the Elementor editor. To do this, simply click on the “Add New Section” button in the Elementor editor and then drag and drop elements onto the page to create your desired layout.
One of the benefits of using Elementor is that it allows for a high level of customization and flexibility. You can easily adjust the placement, size, and design of elements on your page using the intuitive drag-and-drop interface.
In addition to the pre-designed templates and the option to create your own custom pages, Elementor also offers a Theme Builder feature that allows you to design custom headers, footers, and other theme elements for your WordPress site.
Overall, after installing and activating Elementor and Elementor Pro, you can choose a template or create your own custom page using the Elementor editor. With its wide range of customization options and flexibility, Elementor allows you to easily create stunning custom pages that are tailored to your specific needs and preferences.
Step 3: Add Elements To Your Page
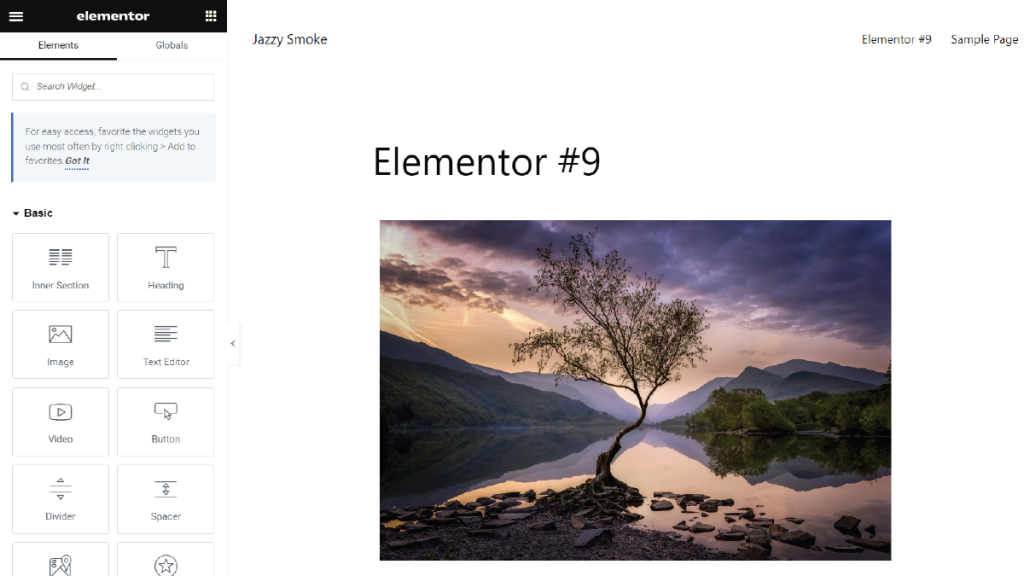
Once you have chosen a template or created your own page in WordPress with Elementor, the next step is to add elements to your page. This is where you can start customizing your page to your liking and make it unique.
Elementor provides a wide range of widgets that you can use to add various elements to your page, such as text, images, buttons, videos, and more. You can easily drag and drop these widgets onto your page and arrange them in any way you like.
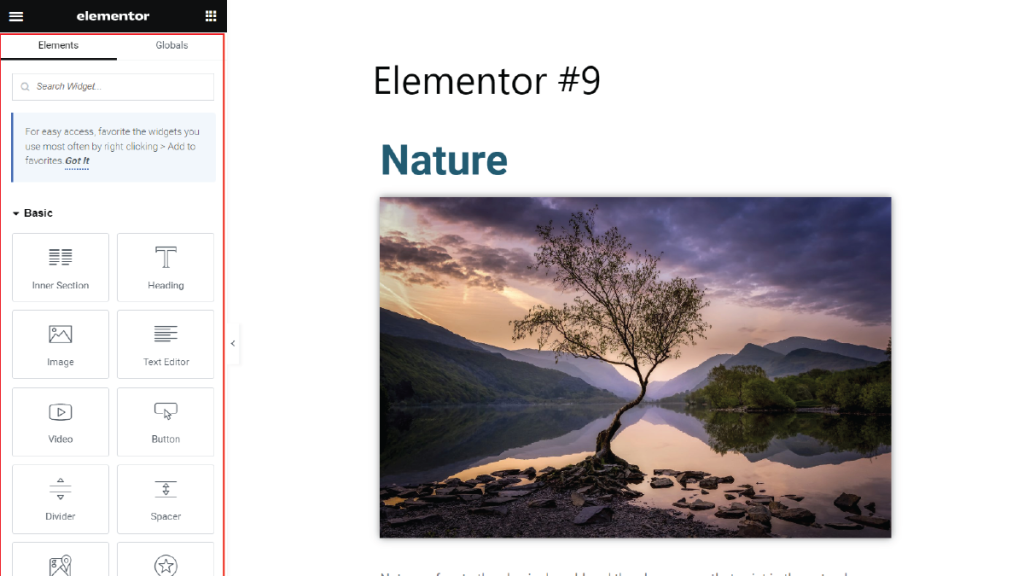
To add an element to your page, simply select the widget from the Elementor sidebar and drag it onto the page. Once you drop it, you can edit the content and style of the element using the settings panel on the left side of the screen.
For example, if you want to add a text widget, simply select the text widget from the Elementor sidebar, drag it onto your page, and start typing in your content. You can change the font size, color, style, and alignment of the text using the settings panel.
Similarly, if you want to add an image widget, select the image widget from the Elementor sidebar, drag it onto your page, and upload the image you want to use. You can adjust the size, position, and other settings of the image using the settings panel.
You can continue adding as many elements as you need to your page, arranging them in a way that makes sense for your content. Elementor provides a lot of flexibility and customization options, so you can make your page look exactly the way you want it to.
Overall, adding elements to your page in Elementor is a straightforward process that allows you to create a custom and professional-looking page without any coding knowledge.
Step 4: Customize The Design And Layout
Once you have added the essential elements to your custom page in WordPress with Elementor, you can move on to step 4, which involves customizing the design and layout of the page to suit your preferences. This step allows you to make your page look unique and visually appealing to your audience.
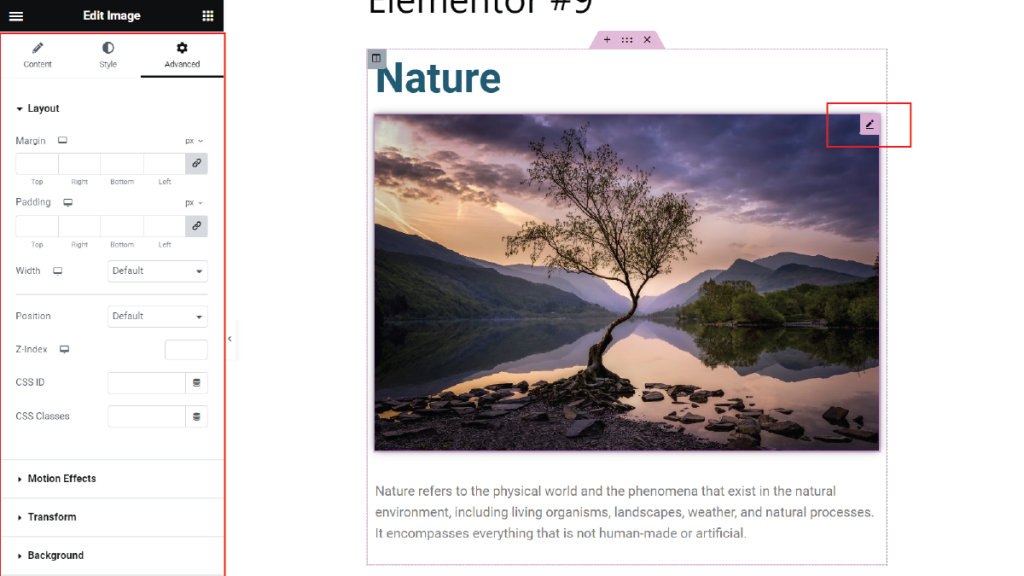
To begin customizing your page, click on the “Edit Section” icon located at the top of each section you added to the page. This will open up the editing options for that section. From here, you can customize the background, padding, and margins of the section.
You can also add new elements to the section by clicking on the plus icon. This will open up a list of widgets and elements you can add to the section. These widgets include images, text, buttons, videos, and many more.
Elementor also provides a drag and drop interface that allows you to move elements around on the page. You can drag an element and drop it onto another section, and Elementor will automatically adjust the layout of the page.
If you want to add more style and design to your page, you can access the “Style” tab in the editing options. This tab allows you to customize the font size, color, and style of text on the page, as well as adjust the border and background of each section.
You can also use the “Advanced” tab to add custom CSS code to your page. This is useful if you want to add unique styles that are not available in the editing options.
Overall, customizing the design and layout of your page with Elementor is a straightforward process that allows you to create unique and visually appealing pages that stand out to your audience.
Step 5: Publish Your Page
The last step in creating custom pages in WordPress with Elementor is to publish your page after customizing the design and layout. Once you have finished customizing your page with Elementor, you can preview it to make sure everything looks the way you want it to. If you’re satisfied with the design and layout, it’s time to publish your page so it can be seen by your audience.
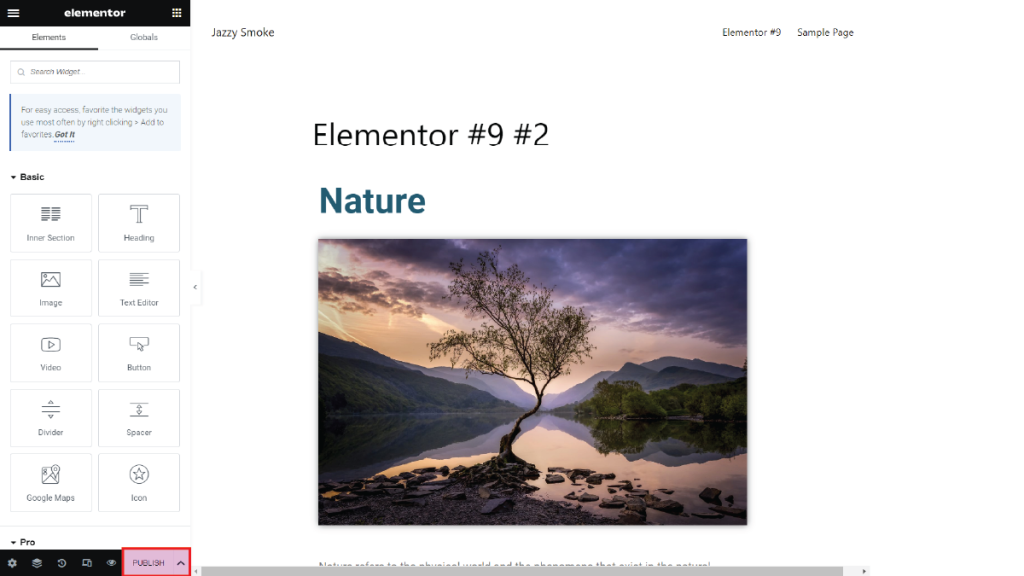
To publish your page, simply click the “Publish” button in the bottom left corner of the Elementor editing screen. This will bring up a dialog box that allows you to set a number of options for your page. You can choose whether to publish your page immediately or schedule it for a later date and time. You can also choose whether to make your page visible to everyone or restrict access to certain users.
Once you have made your selections, click the “Publish” button again to confirm your choices and publish your page. Your page will now be visible on your website for everyone to see. You can also make changes to your page at any time by going back to the Elementor editor and making your desired edits. Just remember to hit the “Update” button to save your changes and make them live on your website.
Overall, publishing your custom page with Elementor is a simple and straightforward process that allows you to share your unique design and layout with the world. Whether you’re creating a landing page, a blog post, or an entire website, Elementor makes it easy to customize your pages and publish them for maximum impact.
Conclusion
In conclusion, creating custom pages in WordPress using Elementor is a great way to enhance the look and functionality of your website. By incorporating WordPress Elementor themes, you can effortlessly develop visually appealing and professional custom pages without any coding knowledge. In this blog post, we have explored what custom pages are and why they are important, as well as different methods to create them. We have also provided a step-by-step guide to creating custom pages using Elementor. By following these simple steps, you can create stunning pages that will help you stand out in the crowded online world. So, whether you are a beginner or an experienced WordPress user, Elementor can help you take your website to the next level. We hope this guide has been helpful in your journey to creating beautiful custom pages in WordPress.
Creating beautiful, customized pages in WordPress becomes a breeze with the WordPress theme bundle. It’s like a special collection of premium themes designed for different types of websites. Whether you’re making a stylish blog, a professional business site, or a cool portfolio, this bundle has you covered. What’s cool is that it gets regular updates, so it stays fresh and works smoothly with the latest wordpress versions. With just one purchase, you can use these awesome themes on multiple websites. Plus, if you ever need help or have questions, there’s a support team ready to assist you. So, make your wordpress journey easier, get creative, and build gorgeous, personalized pages with the wordpress theme bundle.


